The links in these recipes are for products that I use and recommend.

Turkey confit is an indulgent preparation that turns a humble bird into a culinary masterpiece. Unlike the roasted turkey that graces many holiday tables, turkey confit is cooked slowly in fat (preferably duck fat), resulting in meat that is incredibly tender, moist, and infused with flavor. In this post, I’ll guide you through the steps of making turkey confit and share why this dish is so extraordinary.
What is Turkey Confit?
The word ‘confit’ is derived from the French word ‘confire’, which means “to preserve”. The confit cooking method was originally a means of preservation in the days before refrigeration. Meats were salted and then cooked at a low temperature in fat, and subsequently stored in that fat, creating an oxygen-free environment (before canning was discovered) unsuitable for most bacterial growth (see note below). Long ago, a family would keep a large vat of confit (game birds, chicken, pork, rabbit and even fish) in the larder and pull a piece or two as needed for a meal over a period of months.
Turkey confit, therefore, is turkey legs that have been seasoned, and then slowly cooked in fat at a low temperature. The result is a dish that’s incredibly rich and fall-off-the-bone tender.
Why Turkey Confit is Amazing
- Texture: The slow cooking process tenderizes the turkey meat to perfection. The meat is soft and can be easily shredded but with a slight crispness to the skin that is utterly delightful.
- Flavor: Cooking turkey in its own fat or a mixture of fats allows the flavors to marry and intensify over the hours of cooking, creating a depth of flavor that roasting often can’t match.
- Versatility: Turkey confit can be used in a variety of dishes – from sandwiches and salads to tacos, breakfast hash, and pasta. It’s not just for Thanksgiving!
- Preservation: While not as necessary today, confit is an excellent method for preserving turkey. The fat used for cooking acts as a seal that can keeps oxygen from reaching the meat the meat and spoiling it. This means that you can prep your Turkey legs for Thanksgiving well in advance and pop them in a hot oven 30 minutes before the meal for utterly perfect, fall-of-the bone, crispy-skinned turkey legs.
- Simplicity: Despite the lengthy prep and cooking time, the process is very hands-off. Once the turkey is prepped and in the oven, it requires little attention.
How to Make Turkey Confit
Making turkey confit is a simple yet rewarding process. Here’s a step-by-step guide to making your own.
Ingredients:
- Turkey legs (thighs and drumsticks)
- Salt
- Sugar
- Curing Salt (optional)
- Herbs and Spices
Instructions:
- Seasoning Turkey: Weigh the turkey legs to calculate your salt and sugar. Use 10 grams salt (including Curing Salt#1 if using) and 2.5 grams sugar/brown sugar per pound plus herbs and spices as you like. Mix all the seasonings in a bowl first and then rub the turkey legs all over. The salt not only seasons the meat but also acts to draw out moisture, which helps in the preservation process. Don’t skimp on this part – the salt is crucial for both flavor, texture and food safety.
- Resting: Once seasoned, lay the legs in a single layer in a dish, cover with plastic wrap, and refrigerate. Let them sit for 3 days, turning over once during this time. This resting period allows the salt to penetrate the meat and work its magic.
- Rinsing: After the resting period, rinse the turkey legs under cold water to remove excess salt and pat them dry with paper towels.
- Preparing the Fat: Heat your chosen fat in a pot that’s just large enough to fit the turkey legs in a single layer. Warm the fat over medium heat until very warm 185-220 F (not frying temps).
- Cooking the Turkey: Preheat your oven to 185-200°F (93°C). Once the fat is warm, ladle it or pour it very carefully over the turkey. Make sure they are completely covered. If not, add more fat or oil until they are. Slide a wooden spoon or spatula down between the dish and the turkey to release any trapped air bubbles.
- Slow Cooking: Place the pot in the oven, uncovered, and cook for about 8 hours. This low and slow process is the key to confit.
- Checking Doneness: The turkey is ready when it’s incredibly tender to the touch, practically falling off the bone. With a sterile fork, stab the meat. The fork should slide right out with no resistance.
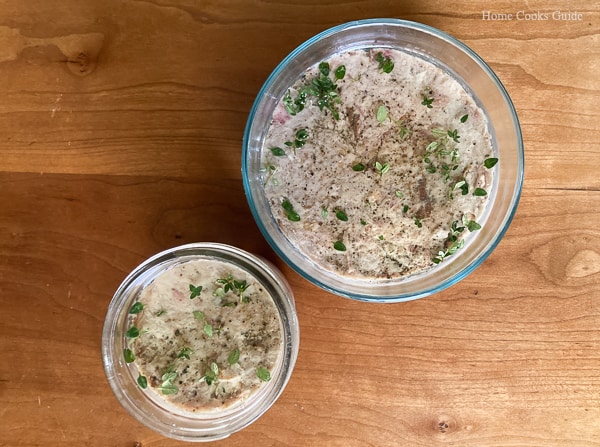
- Cooling and Storing (Optional): Allow the turkey to cool in the fat, then store it in the refrigerator submerged in the fat for up to a couple of weeks (or months if curing salt was used and it’s properly handled and stored). Alternatively, you can transfer the turkey to vacuum seal bags and ladle in some fat.
- Finishing: When ready to serve, remove the legs from the fat and wipe off excess. For crispy skin, sear the legs in a hot skillet or roast in a 450 F oven for 20 minutes or until golden brown and heated all the way through. Alternatively, turkey confit can be removed from the bone shredded and pan-fried for tacos or breakfast hash, or turned into rillettes for an appetizer.
If you are interested in making confit, you may find relevant and helpful tips on my post for duck conft.
Print
Turkey Confit
- Prep Time: 3 days
- Cook Time: 8 hours
- Total Time: 80 hours
- Yield: 2 turkey legs confit 1x
- Category: Charcuterie
- Method: Baking
- Cuisine: French
- Diet: Gluten Free
Ingredients
10 lbs turkey legs (4–5 legs)
88 grams (10 Tablespoons Diamond Crystal Kosher) salt
12 grams Pink Curing Salt #1 (optional, add this amount more of reg. salt if omitting)
24 grams (2 Tablespoons) brown sugar
Optional Herbs and Aromatics
4 grams (1 teaspoon) whole peppercorns
10–12 sprigs fresh thyme (no need to pick off the leaves)
5–10 fresh sage leaves
4 6″ inch sprigs of fresh rosemary
5 garlic cloves, crushed
zest of half a lemon/orange
Instructions
- Seasoning Turkey: Mix all the seasonings in a bowl and then rub the turkey legs all over.
- Resting: Once seasoned, lay the legs in a single layer in a dish, cover with plastic wrap, and refrigerate. Let them sit for 3 days, turning over once during this time.
- Rinsing: After the resting period, rinse the turkey legs under cold water to remove excess salt and pat them dry with paper towels.
- Preparing the Fat: Heat your chosen fat in a pot that’s just large enough to fit the turkey legs in a single layer. Warm the fat over medium heat until very warm 185-220 F (not frying temps).
- Cooking the Turkey: Preheat your oven to 185-200°F (93°C). Arrange the turkey legs in an over proof casserole dish/hotel pan or pot. They fit snugly in a single layer with at least 2 inches of free space above. Carefully ladle or pour the warm/hot fat over the turkey. Make sure the legs are completely covered. If not, add more fat or oil until they are. It’s ok to mix duck fat and olive oil if you are in a pinch. Slide a wooden spoon or spatula down between the dish and the turkey to release any trapped air bubbles.
- Slow Cooking: Place the pot in the oven, uncovered, and cook for about 8 hours. This low and slow process is the key to confit.
- Checking Doneness: The turkey is ready when it’s incredibly tender to the touch, practically falling off the bone. With a sterile fork, stab the meat. The fork should slide right out with no resistance.
- Cooling and Storing (Optional): Allow the turkey to cool in the fat, then store it in the refrigerator submerged in the fat for up to a couple of weeks (or months if curing salt was used and it’s properly handled and stored). Alternatively, you can transfer the turkey to vacuum seal bags and ladle in some fat. If you are not using the curing salt, you need to make an effort to cool this down quickly. See note below.
- Finishing: When ready to serve, remove the legs from the fat and wipe off excess. For crispy skin, sear the legs in a hot skillet or roast in a 450 F oven for 20 minutes or until golden brown and heated all the way through. Alternatively, turkey confit can be removed from the bone, shredded and pan-fried for tacos or breakfast hash, or turned into rillettes for a delicious appetizer.
Equipment

| Lodge 3.6 Quart Enamel Cast Iron Casserole Dish with Lid (Carribbean Blue) |
Buy Now → Buy Now →
| 2 1/2″ Stainless Steel Hotel Pan |
Buy Now →Notes
Curing Salt and An Important Food Safety Note:
Curing salt is used to prevent botulism, a deadly toxin caused by the bacteria C. Botulinum that grows in room-temperate anaerobic, non-acidic environments. It also gives the meat a rosy hue and cured meat flavor. I like using curing salt, for peace of mind and because I think the meat tastes better with it.
If you are concerned about nitrates or don’t want to purchase a special ingredient that you will rarely use, it is technically not necessary for food safety in this recipe provided that after the confit comes out of the oven, it passes through the danger zone (140-42 F) within 4 hours. In my past life, when I was a licensed meat processor, I spent a lot of time logging cooling temps and times for charcuterie and I can tell you that cooling a vat of confit within this window is not as easy as it sounds. Simply leaving the confit out on the counter to cool will not be sufficient for this size container to get the temp through this zone quickly enough. If you put it directly in your refrigerator, you will warm your fridge, and the top layer of fat will solidify and insulate the interior. You will need to leave it out in a cold garage for 2 hours and then transfer it to a not-too-full fridge. Otherwise, please use the curing salt.
Another option for quick cooling is to put the turkey leg in a vacuum seal bag while still hot/warm (use sterilized utensils and handle carefully as it is fragile when hot) with some fat, seal it, and then submerge the sealed bag in ice water.


