
Description
This is a step-by-step of a basic sourdough loaf with lots of room for variation. The images here are of my Slightly Rye Loaf. Note: for any of my bread recipes you will need a kitchen scale.
I start in the evening. Let it ferment overnight and bake in the morning.
Ingredients
60–100 g sourdough starter
500 g flour
350–400 g warm water
8 g salt
OPTIONAL
15–30 g honey
15–30 g oil
15–30 g dry milk powder
30–60 g flax seeds/other fillings or flavorings
Instructions
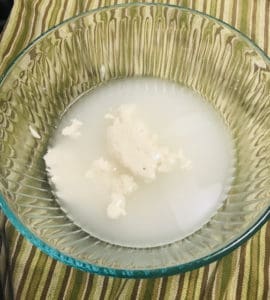
- Tare a mixing bowl on your kitchen scale. Add your warm water and starter. Notice in the picture that the starter is floating. This is considered a good sign of an active, ready starter. If yours doesn’t float don’t despair. I have made many loaves with a sinking starter that have turned out great. In fact, sometimes I intentionally start with a freshly fed starter that will sink and give it a longer fermentation time.
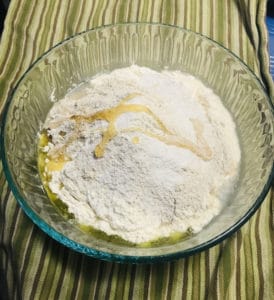
- Tare the mixing bowl again. Add your flour. Tare again, and add your salt. Tare again and add honey or oil or any other ingredients if using. Notice no measuring cups or spoons used here. Its a personal goal of mine to find ways to use as few dishes as possible for any given task and using a kitchen scale makes that easy.
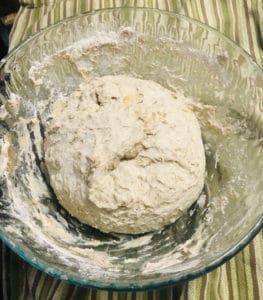
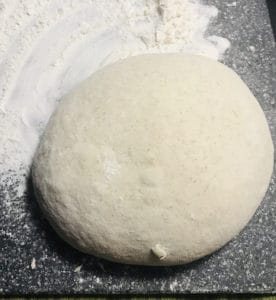
- Mix all ingredients together until a sticky dough forms. Let that hang out on your counter for 30 minutes or so and then fold it a couple of times and shape it into a rough ball.
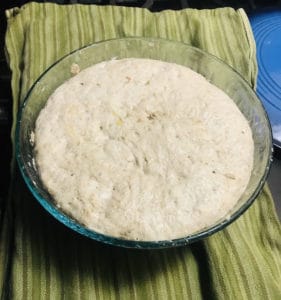
- Cover and let rise/ferment for 8-10 hours if your ambient temps are 80 degrees or higher, 10-14 hours for ambient temps of 67-79 degrees, 14-18 hours for ambient temps around 60. 24 hours for ambient temps between 40-60. This is called the “bulk fermentation.”
- After this fermentation period, the dough should have doubled in size. Pour it out on a floured surface and let it hang out for 10 minutes or so. This is called the “bench rest.” If I’m in a hurry, sometimes I skip this step. I’m sure professional bakers would cringe to hear that, but I still end up with acceptable, very edible loaves.
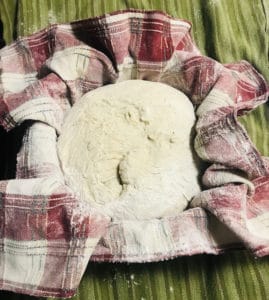
- Fold the dough for about 30 seconds and shape it into a ball. Line a smaller bowl, just about the size of the dough ball with a floured cloth napkin, and plop the dough ball inside with the seam side up. Cover it and let rise for another 1-2 hours in a warm place (longer in a cooler place). The higher the temp, the faster the rise. Sometimes I put this on the stove as the oven preheats which is pretty warm and speeds it up or I’ll stick it in the cool garage to give me more time. Preheat your oven to 500 degrees F.
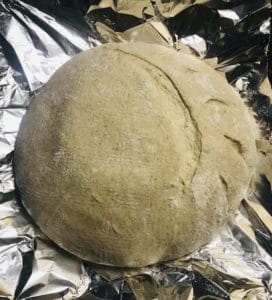
- Invert the bowl onto a piece of parchment paper or tin foil and carefully pull the floured cloth napkin away from the dough. Cut your vents. Transfer parchment and dough to your preheated cast iron dutch oven and immediately reduce temperature to 425 F. Cover and bake for 25 minutes.
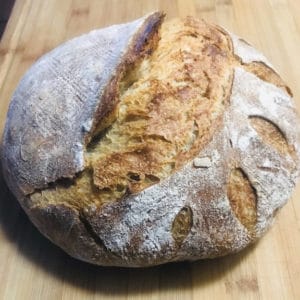
- Remove the lid and bake for 20 more minutes.
- Remove the loaf from the oven and let cool for about 1 hour or longer before slicing and enjoying.
Variation
This variation is more hands-on. I started incorporating these steps into my process after reading Tartine, by Chad Robertson and the result is a crumb (the inside of the bread) with bigger air holes in it which I like. Chad Robertson’s method calls for a bulk fermentation period of about 4 hours followed by the final rise of another 4 hours. This doesn’t work with my schedule or my house temperature so I stick with a long bulk fermentation and then an accelerated final rise in a warm place (my stove while the oven preheats).
In Steps 1 and 2 above, withhold about 50 grams of water and all of the salt.
After Step 3, add the 50 grams of water and salt and work in with your hands. Squeezing the dough between your fingers until the salt and water is incorporated. For the first 2-3 hours of the bulk fermentation period, turn the dough every 30 minutes in its container by reaching underneath the dough with a wet hand and pulling up and then down back to the top center of dough ball. Give the bowl a quarter turn and repeat another 3 times for a full turn.
Notes
Starter: Most recipes will say to use an active bubbly starter. I have found that if I’m using fresh milled whole grains with lower gluten (like spelt, rye, amaranth…) I like to use a starter that was fed only a couple of hours ago and ferment for longer, like 24 hours at lower temps.
Flour and grains: Of the 500 grams of flour, I tend to use mostly High Protein Bread Flour (300-400 grams) with the remaining some combination of whole grain, rye, spelt or freshly milled grains like buckwheat, bulgar, farro, amaranth, millet, oats, etc. High Protein Flour and All Purpose Flour seem to ferment faster and absorb less water, the more whole grains the more fermentation time and water is needed.
Water: I’ve seen a lot of recipes calling for 350 grams of warm water. I like a more hydrated loaf so I typically go for 375 – 400 grams, any more than that and your dough starts to get a little unruly to work with. Some breads like ciabatta call for almost 100% hydration but I have yet to make a good one.
Other ingredients: With a focus on technique you can make amazing loaves that any purist would be proud of with just water, salt, flour and your starter. However, for variation you can also add all sorts of stuff to your bread. I like honey. It adds a little sweetness and I imagine the living bacteria and yeast like it too. I have a hunch the oil and dry milk powder increases shelf life so I often use them as my small family can’t always keep up with the pace of my bread production. Dry milk also adds more protein which I try to sneak in as much as possible. Things like oats and flax seeds add more fiber and protein as well and taste good. You can get creative here and add poppy seeds, nuts, dried fruit, chocolate chips… whatever you want. Just keep in mind that if you are adding dried ingredients or grains that absorb water like oatmeal or dried fruit it will absorb more of your water in the dough so you may want to make your dough a bit wetter or soak those ingredients in water before adding to your dough.