Description
Pickled garlic scapes are beautiful and delicious. Perfect for eating out of the jar, garnishing a bloody Mary, or serving as an accouterment to a meat and cheese platter.
Ingredients
4 lbs garlic scapes
8 cups white vinegar
8 cups water
4 Tablespoons Salt
4 Tablespoons Sugar
Per Quart Jar (4 Jars in total)
1 1/2 teaspoons dill seed
1 1/2 teaspoons whole mustard seed
1 teaspoon black peppercorns
2 whole bay leaves
1 dried hot chili (optional, more if you like it spicy)
1/4 garlic scape minced
sprigs of fresh dill or tarragon (optional)
Instructions
Fill a water bath with water and the quart jars and bring to a boil.
Meanwhile, in a smaller sauce pan, add water and the jar lids and bring to boil.
Combine the water, vinegar, sugar, and salt in a pot (5 quarts or larger) and bring to a boil.
Clear off and clean your work surface. Round up a town for the counter, jar tongs, the magnet lid lifter (if using), a clean tea towel, and a wide mouth funnel and ladle or a pitcher for pouring the vinegar into the jars.
Trim the ends of the garlic scapes if they look dry. Thinly slice one garlic scape and divide it into 4 equal portions, one for each jar.
Once the vinegar mixture and the jars have come up to a boil, reduce the heat on both to low.
Using the jar tongs, remove one jar from the canner and carefully pour out the water. Place it on the towel on the counter. Add the chopped garlic scape, mustard seed, dill seed, fresh herbs, bay leaves, and dried chili. Pack the jar with scapes (about 1 lb per jar).
Using the wide mouth funnel or the pitcher, pour the vinegar mixture into the jar leaving 1/2 inch headspace. Insert a butter knife all down the side of the jar and pull the handle of it towards the center to remove air bubbles. Repeat this a couple of times. If the liquid level dropped add a little more.
Dip a corner of the clean tea towel into the boiling canner and then wipe the rim of the jar. Using the lid magnet, remove a lid from the boiling water and place it on top of the jar. Put on the ring and tighten until just barely finger tight (when it just barely meets resistance, see note).

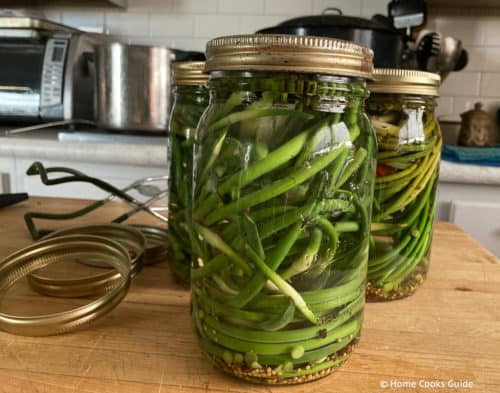
Prepared Jars of Pickled Garlic Scapes ready for the canner.
Set the prepared jar aside and repeat with the rest of the jars. Once all the jars have been prepared, place them in the water bath canner. They should be covered with at least 1/2 inch of water. Add more water if needed. Turn the heat back up to high and bring it back to a boil. Once it has reached a boil, process for 25 minutes (at sea level, adjust for elevation). See canning altitude chart.
Carefully remove the jars from the canner and place on a towel on the counter. Do not touch the jars until fully sealed and cooled.
Notes
NOTE: Air needs to be able to leave the jar as it is heated in the canner. This is how the vacuum is created. If the lid is too tight the air cannot leave and the jar may crack in the canner. Tighten the ring just until you feel the start of some resistance, the minimal amount needed to keep the lid in place.
NOTE: If you have never canned before I highly recommend this tutorial. Water bath canning is simple to do but there are some important food safety issues you should be aware of. Most importantly – you can only water bath can products that have a PH of 4.6 or lower.
