• Skip to primary navigation
  • Skip to main content
  • Skip to primary sidebar
  • Home
  • The Blog
  • About
  • Work With Me
  • Shop

Home Cooks Guide

A professional chef's guide to the home kitchen

Sidebar Alt / Content _ RECIPE PAGE TEMPLATE

Terrine De Campagne (Country Pâté) Master Recipe

March 20, 2024

The links in these recipes are for products that I use and recommend.  

Terrine De Campagne or Country Pâté may sound fancy, but in truth, this was historically considered simple peasant food. A versatile and rustic meatloaf that is equally suited for both formal dinner parties and casual picnics. Depending on if, and how, you choose to garnish this loaf, it can be a very economical dish to make.

When I was chef at the Charcuterie, Country Pâté studded with Pistachio and Duck Confit was one of my most popular products. While most of my other products rotated seasonally, this pâté had a permanent place in our cold case, next to my Dry-Cured Bacon and Duck Confit. I have received many requests for this recipe over the years so here it is: my Master Recipe (designed for industry and meant for scaling and customizing). My Country Pâté studded with Pistachio and Duck Confit recipe is scaled and modified for the home kitchen is in a separate post.

What are Pâtés and Terrines

These two terms are often used interchangeably. A “terrine” is the name of a baking dish. “Terrine” is also the name of the loaf that is shaped by this baking dish. It may contain liver (like this one does) or not. It may be baked in the terrine (like this one is) or the ingredients may be cooked first and then molded by the terrine, held together with a mousse or gelatin (aka aspic), like headcheese. A terrine can be sliceable or spreadable or both.

Pâté, on the other hand, is a meat spread that contains liver, either a lot or a little bit. It can be smooth and creamy or coarse and chunky. Nowadays you sometimes see “Vegetarian Pâtés” or “Salmon Pâtés”. These names are taking some liberties with the word “pâté”.

Classic French meat-based terrines and pâtés are typically enjoyed on bread or crackers with cornichons, mustard, olives, other pickled things, dried fruit, preserves, and/or nuts.

What does “De Campagne” Mean?

Pronounced “də kah~/pahn”, it means “of the country”. Terrine de Campagne is a rustic loaf made from coarse ground meat and herbs. My version contains pork, a little bit of liver, brandy, and lots of herbs. I usually garnish the inside of this with pistachio and duck confit. The pistachios add visually to the loaf when it is sliced. However, you can play around with the garnishes to come up with an infinite number of variations and I have made many many versions of this recipe over the years. Sometimes changing out the garnishes for walnuts and sauteed mushrooms, cooked diced carrot, pitted chopped Castelvetrano olives, or diced chicken breast or pork loin. I have made versions of this recipe with rabbit and poultry and mixtures of pork and rabbit and poultry, sometimes adding hearts in place of the liver to it if I have those on hand (which I often do).

How to Make Country Pâté (Terrine de Campagne)

I work off “Master Recipes”. This is the process and the ratios. From here, there are infinite options for you to customize. This is the place to start if you have a specific amount of meat from your recent hunting trip or farm harvest that you want to use, or if you are making a large batch in a commercial kitchen. If you are playing around with this recipe at home, I recommend scaling it by 10%-20%. Simply multiply all ingredients by .1 or .2 to make 1-2 loaf pans.

I have also provided my recipe for Country Pate with Pistachio and Duck Confit in a separate post for which I have received several requests from my readers and past customers. If you are looking for a recipe that has already been scaled to work in the home kitchen, this is the one for you.

Making pâté is a project. This is something to do on a cool and rainy weekend. It’s not difficult but there are a lot of steps and a lot of inactive time between them. This pâté also freezes well. It is worth making a large batch (say 2-3 loaf pans worth) at home, portioning it into 4-8oz chunks, vacuum sealing the portions, or wrapping them tightly in several layers of plastic wrap, and stocking your freezer. I have a freezer full of pâté. I used to make 20-40lb batches of pâté in a commercial setting, grinding and mixing the forcemeat in a Hollymatic, prepping on a completely cleared 6-foot table, cooking the loaves in several 2-inch hotel pans, and cooling them in a walk-in refrigerator piled high with ice from a bottomless ice machine. You likely do not have this type of equipment on hand. Anything larger than 3 loaf pans will start to get a bit unruly in most home kitchens – requiring extra-large bins, special mixing equipment, and most importantly more fridge space than you probably have to cool this down as quickly as it needs to for proper food safety. Do yourself a favor and don’t make batches of charcuterie larger than you have the proper space and equipment for.

Print
clock clock iconcutlery cutlery iconflag flag iconfolder folder iconinstagram instagram iconpinterest pinterest iconfacebook facebook iconprint print iconsquares squares iconheart heart iconheart solid heart solid icon

Terrine De Campagne (Country Pâté) Master Recipe

5 Stars 4 Stars 3 Stars 2 Stars 1 Star No reviews
  • Author: Kara Taylor- Home Cooks Guide
  • Prep Time: 2 hours
  • Cook Time: 1-3 hours
  • Total Time: 48 hours
  • Yield: approx 16lbs 1x
  • Category: Charcuterie
  • Method: Baking
  • Cuisine: French
Print Recipe
Pin Recipe

Description

This Master Recipe is intended to be scaled and customized.  For a more specific recipe that has been scaled already to a 1 loaf pan batch see Chicken Bacon Chestnut Pâté or Country Pate with Duck Confit and Pistachio.

This recipe is set for a batch using 10lb of meat for easy scaling. To make a batch with 1lb of meat, multiply all ingredients by 0.1.  To make a batch for 20 lbs, multiply all ingredients by 2.


Ingredients

Scale

10 lbs meat (pork, rabbit, chicken, goose, duck, and/or turkey), ground or chopped

1 lb fatty bacon (I always have this dry-cured bacon on hand )

1 2/3 lbs liver (soaked overnight in milk)

165 grams onion or shallot

3–4 cups chopped herbs (parsley, thyme, chives, tarragon, and/or sage)

120 grams garlic cloves

100 grams salt

9 grams curing salt #1 (optional, but recommended, see note 1)

19 grams black pepper, ground

10 grams (2 teaspoons) pâté spice (see note 2)

10 eggs

100 grams (11 Tablespoons) Flour

163 grams (11 Tablespoons) Brandy

192 grams (.8 cups) Cream

4–8 cups garnish (ie. diced chicken, pork loin or duck, duck confit chopped, nuts, dried fruit, sauteed mushrooms, olives, cooked vegetables)

caul, bacon slices, swiss chard leaves for lining terrine (optional, see note 3 below)


Instructions

Pâté Prep

Organize your materials and make sure you have a clean sanitized surface and equipment.  You will need:

  • 4-5 mixing bowls (1-2 large, 3 medium)
  • Cutting board
  • knife
  • measuring cups and spoons
  • Spatulas/ wooden spoons
  • Terrine dishes (8 quart capacity/1 hotel pan for every 10lbs of meat)
  • Parchment
  • Plastic Wrap
  • Tin Foil
  • Probe thermometer
  • Whisk
  • Meat Grinder (optional)
  • Meat Mixer (optional)
  • Gloves (optional but nice)
  • Kitchen Scale 
  • Weights for terrine (see instructions)
  • Clean prep space
  • Enough refrigerator space to fit terrines and allow for air circulation

The night before making this terrine, soak the liver in milk.

The next morning, drain, rinse and dry the livers.  Trim them of any unsightly spots.

In a bowl, combine all the dry spices.  Mix well.  Add the meat, bacon and liver, onions, garlic, and fresh herbs.  Let this mixture sit in the refrigerator for at least 1 hour or overnight.  NOTE: If you are using ground meat, everything else should be minced.  If you are grinding your own mixture, you can leave these things coarsely chopped and grind everything up together.  

In another bowl, combine the eggs, cream, booze and flour.  Whisk until all lumps are gone.  Refrigerate until ready to mix with the meat mixture.  This is your “Panade”

In another bowl, combine your garnishes.

In another bowl, place your caul or bacon slices for lining the terrine dish (if using)

Grind the meat mixture (optional step)

If you are using ground meat, you can skip this step and save yourselves some time and dishes.  However, grinding your own mixture gives you more control over the final texture of the product and is ideal if you are using your own game or farm-raised meat.  I like to grind my own because I like some of the mixture to be ground fine and some to be coarser.  I run everything through the medium or large die once and then I put about half the mixture back through for a second time.  You could also switch between the coarse and medium die or the medium and fine die to achieve the same effect (but then you’d lose some time and end up with more dishes).

If grinding your own meat, put the auger, the die, and the tray of the grinder into the freezer or refrigerator at least 30 minutes before you plan to start grinding.

Assemble the cold grinder pieces with a mixing bowl set up to catch the ground meat.

Grind the meat mixture into the mixing bowl.

Mix the forcemeat

Add the panade to the meat mixture.  Mix the meat and panade together until it is completely incorporated and the meat mixture begins to look tacky.  This takes about 5 minutes.  You can do this by hand for amounts less than 5 lbs.  More than that and you probably will want to use a large stand mixer with a paddle attachment on low-medium or a special meat mixer used for sausage making.  

Fold in the garnishes

Once the forcemeat is mixed, fold in the garnishes until evenly distributed.

Assemble the Terrine

Lay out the terrine dishes you are using to bake this pâté.  I use bread loaf pans for small batches and a half or full size hotel pans for large batches.

Oil the baking dish.  Line the dish with caul or bacon strips or professional grade plastic wrap (no need to oil terrine if going with this option) so that the lining material overhangs enough to fold over and cover the top when filled.  You can also line it first with caul or professional grade plastic wrap and then with swiss chard leaves for a dramatic and tasty effect.

Fill the terrine with the forcemeat.  Try to avoid air bubbles.  I do this by spooning in a little bit at a time and pushing it down in the dish.  Then add more and layer it up to the top.  Fold over the overhanging caul or bacon strips (or plastic wrap).  Cover with a layer of parchment paper followed by a layer of tin foil.

Bake at 300 F until a probe thermometer inserted into the middle of the pâté reads 140 F (if no poultry or poultry liver) or 155 F if using poultry (it will continue to cook after it comes out of the oven).

When the thermometer goes off, slowly pull the probe out, pausing to read the temp on its way up.  Usually, the probe settles to the bottom of the loaf which is the hottest part.  The middle will be less done and the top even less.  Make sure the coolest part of the loaf (the top half) is reading 140 or 155 F.

Remove the loaf(s) from the oven.  Keep covered for another 10 minutes.  Remove the cover and let it cool to room temp over a period of 1-2 hours (if you have a cold and clean garage, you can move it there to speed the cooling process).

Wrap the terrine completely with plastic wrap, all the way around the terrine dish (aka “hotel wrap” in industry speak).  Weight the terrine down.  You can do this by cutting out a piece of cardboard to fit on top of the terrine and then add full cans from the pantry on top, or you can take another similar-sized loaf pan and fill it half way with ice water and place that on top.  Refrigerate the weighted terrine for 12-24 hours. See note below for important food safety info.

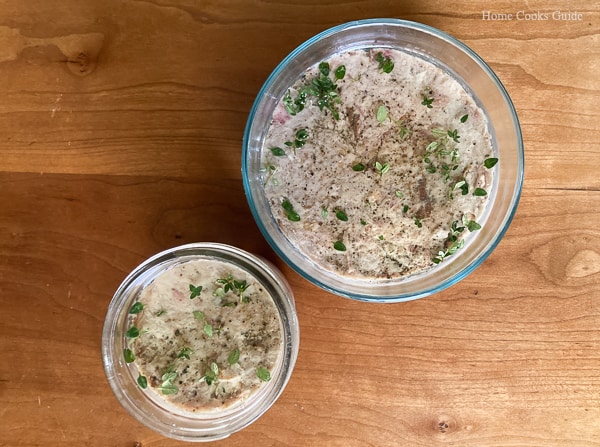
Left Pan: Crepinettes. One wrapped with swiss chard and caul. I’ll eat that one first. Middle Pan: Crepinettes. Right Pan: Pate Loaf, partially wrapped with swiss chard.

Portion and Serve Terrine

Invert the terrine onto a cutting board and slice it into portions.  At this point, you can serve it or vacuum seal/wrap in several layers of plastic wrap and freeze it.  Vacuum sealed, this product will last 6 months or more in the freezer.  Wrapped in plastic wrap, 2-4 months.


Equipment

Image of | Kitchen Aid 6 Qt Stand Mixer |

| Kitchen Aid 6 Qt Stand Mixer |

Buy Now →
Image of | Pyrex Mixing Bowl Set |

| Pyrex Mixing Bowl Set |

Buy Now →
Image of | Ozeri Kitchen Scale |

| Ozeri Kitchen Scale |

Buy Now →
Image of | Kitchener Heavy Duty Electric Meat Grinder |

| Kitchener Heavy Duty Electric Meat Grinder |

Buy Now →

Notes

1) IMPORTANT FOOD SAFETY CONSIDERATIONS:

If you are using the curing salt, you have 15 hours to get your terrine cooled down from 140 F – 41 F or below.  If you are NOT using the Curing Salt, you have only 4 hours to get your terrine from 140-41 F.  If you are making a 2-quart loaf pan of pâté, this is pretty easy to achieve without much effort. However, if you are making a larger batch using half or full-size hotel pans and placing it in a tightly packed refrigerator, you would be surprised how long food can stay above 41 F and in the “danger zone”.  Do not attempt to make large batches without first having plenty of fridge space (like an extra empty fridge for projects like I have) and plenty of ice.  You will want to weigh the terrines down with ice water to accelerate the cooling process.

2) Kara’s Pâté Spice

  • 25 grams (1 2/3 T) ground white or black pepper
  • 12 grams (2 1/2 t) ground nutmeg
  • 12 grams (2 1/2 t) ground ginger
  • 2 grams (1/2 t)ground cloves
  • 10 grams (2 t) of ground coriander
  • If you want to use a pre-made spice blend instead, look for “Savory Quatre Épices”

3) Lining the Pâté

Caul fat is my preferred method for lining terrine dishes.  It is cool and easy to work with though hard to find.  You’ll want to ask at the grocery store meat counter or specialty butcher if they can order some for you.  It may come in a large block which you would want to repackage into usable portions and then freeze for later use.  Bacon slices are labor-intensive and expensive but delicious.  The bacon also shrinks as it cooks so make sure the pieces overlap.  Ask at the meat counter for thinly sliced bacon for this purpose.  I like using swiss chard leaves either under caul or under professional-grade plastic wrap.  This adds visual appeal to the terrine.  The shelf life is shorter though so keep that in mind and only use this method on terrines that are going to be consumed within a week or so.  You can also skip caul, bacon, or swiss chard and use only professional-grade plastic wrap.  No need to oil the terrine if you use this option.  This is not my preferred method as cooking in plastic wrap kind of hurts my soul, but I have done it in a pinch with fine results.

Did you make this recipe?

Tag @homecooksguide on Instagram and hashtag it #homecooksguide

Filed Under: Appetizer, Budget Bites (under $2), Entertaining, Sausage and Charcuterie, Uncategorized Tagged With: charcuterie, DIY

Chicken, Ginger and Goji Berry Soup for Healing and Recovery

March 14, 2024

The links in these recipes are for products that I use and recommend.  

An essential home remedy for cold-and-flu and injury recovery.

Every home cook needs a couple of “Get Well” recipes up their sleeve, this is one of mine. This Chinese-inspired Chicken, Ginger and Goji Berry Soup is delicious, rich, easy on the stomach, and packed with comforting nutrition for healing, recovery, and immune support. You will want to add this nourishing soup to your recovery regimen for sickness, or injury. Every ingredient in this soup brings with it potent health benefits. Aside from the health benefits of this soup, it is just plain delicious.

Healing Ingredients:

Ginger– Ginger has been used for thousands of years as a medicinal plant and is known to be effective at treating nausea and morning sickness, upset stomach, pain relief, and inflammation. Gingerol is cardiotonic.

Garlic– Rich in vitamin B and C, minerals, and allicin. Garlic has known antibiotic, antimicrobial, cholesterol-lowering, and cancer-fighting properties.

Goji Berries-A superfood high in Iron, Vitamin A and C. Goji berries have potent immune-boosting properties. These berries are also used medicinally for eye, liver, kidney, and lung health.

Coconut Aminos– This umami-rich seasoning contains less salt than soy sauce and 17 amino acids which are important in immunity, building muscle, and various other bodily functions. Mostly, liquid aminos are a super delicious seasoning that balances salty and sweet.

Salt – Replenishes electrolytes and aids in hydration

Gelatin – Full of amino acids glycine and proline which support skin, hair, nails, joints, and the immune system. Gelatin is what makes bone broth so nutritious. I use unflavored powdered gelatin to make “Cheater bone broths” out of quick or store-bought broths. Mixed with dry ingredients like salt and spices, gelatin can be added directly to simmering liquids without having to “bloom” first.

Chicken and chicken fat– Contains protein, niacin, selenium, and iron. Chicken (and duck) fat are relatively low in saturated fat and high in linoleic acid an Omega-6, and Vitamin E. If you are the type of home cook that has some duck fat in the fridge, you could spoon a tablespoon into the soup for added nutrition and yumminess.

Rice– Provides easy to digest carbohydrates, protein, iron, B vitamins, and magnesium. White rice replenishes glycogen stores in your muscles after physical exertion from an intense workout… or labor. (The Reason Athletes Eat White Rice Instead of Brown).

Carrots and Squash – These vegetables are high in fiber, Vitamin A and Vitamin C.

I got the idea for this soup from a recipe in the book “The First Forty Days: The Essential Art of Nourishing the New Mother” by Heng Ou. This book is filled with traditional Chinese wisdom and simple and beautiful recipes for healing and caring for new mothers. I highly recommend this book for every new mom. It helped me rethink caring for myself after the birth of my second child. Something I completely neglected with my first child- returning to work in the commercial kitchen a mere 2 weeks after a complicated childbirth.

Though this book focuses on postpartum care, the recipes are all about healing, boosting the immune system, and recovering after extreme physical exertion. These recipes are just as useful for those recovering from illness, a sports injury, or …. a hangover.

Heng Ou has a recipe in this book “Chicken, Red Date, and Ginger Soup” recipe made with goji berries, and jujubes (Chinese Red Dates). I thought the idea of adding dried fruit to chicken soup sounded really interesting. When I got around to making it though, I didn’t have Jujubes, so I made some substitutions. While I was making the soup I decided to add some things to make the broth really rich (coconut aminos, gelatin) and the soup more filling (rice and squash). The resulting recipe is an incredibly satisfying, healthful, healing, immune-boosting soup that can be enjoyed as a full meal whether you are feeling depleted, under-the-weather, or… perfectly well and in the mood for some comfort food.

Print
clock clock iconcutlery cutlery iconflag flag iconfolder folder iconinstagram instagram iconpinterest pinterest iconfacebook facebook iconprint print iconsquares squares iconheart heart iconheart solid heart solid icon
Bowl of Chicken, Ginger and Goji Berry Soup with Rice.

Chicken, Ginger and Goji Berry Soup with Rice for Healing and Recovery

5 Stars 4 Stars 3 Stars 2 Stars 1 Star 4.8 from 17 reviews
  • Author: Kara Taylor- Home Cooks Guide
  • Prep Time: 10 minutes
  • Cook Time: 2 hours
  • Total Time: 2 hours
  • Yield: 3 qts 1x
  • Category: Soup
  • Method: Boil
  • Cuisine: Chinese
  • Diet: Gluten Free
Print Recipe
Pin Recipe

Description

This incredibly satisfying soup is packed with potent healing ingredients like ginger, goji berries, and garlic.  You will want to add this to your get-well regimen for sickness and injury.


Ingredients

Scale

1 4-5 lb chicken

water, about 8-12 cups

4 inch piece of ginger, halved crossways and lengthways

5 large garlic cloves, crushed

1 medium onion, halved

salt

coconut aminos (or soy sauce)

1 T unflavored gelatin powder (optional)

1–2 T salt

6 carrots, peeled and sliced 1/2 inch thick

1 delicata squash (or small butternut squash), peeled and diced

1/2 cup dried goji berries

2 cups white rice, cooked


Instructions

Bring chicken and water up to a boil with the onion, garlic, and ginger.  Reduce the heat to a low simmer and cook for 1-2 hours or until the chicken comes off the bone easily.

Remove the chicken from the pot.  Using a sieve or a spider, fish out the garlic, ginger, and onion (or you could pour the broth through a sieve).

Mix the gelatin with salt, add this mixture to the broth.  Add about 2 tablespoons of the Coconut Aminos.  Taste and add more salt and Aminos until you reach the desired savoriness.

Add the carrots, squash and goji berries and simmer for 20-30 or until all the vegetables are tender.

While the vegetables cook, remove the chicken from the bones.  Shred the meat.

Add the chicken to the soup and remove from the heat.

Serve with cooked white rice.


Equipment

Image of | Grassfed Unflavored Gelatin Powder, 1.5 lbs |

| Grassfed Unflavored Gelatin Powder, 1.5 lbs |

Buy Now →
Image of | Red dates |

| Red dates |

Buy Now →
Image of | Goji Berries |

| Goji Berries |

Buy Now →
Image of | The First Forty Days: The Essential Art of Nourishing the New Mother |

| The First Forty Days: The Essential Art of Nourishing the New Mother |

Buy Now →

Did you make this recipe?

Tag @homecooksguide on Instagram and hashtag it #homecooksguide

Filed Under: Cooking with Leftovers, Dairy Free, Gluten Free, Meat, Soup, Uncategorized Tagged With: chicken, coconut aminos, cold and flu, goji berries, hangover, healing, health, immune, postpartum, recovery, remedy, rice, squash

The Best Andouille Sausage Recipe

January 17, 2024

The links in these recipes are for products that I use and recommend.  

This is the best Andouille Sausage Recipe

This is one of the first recipes I developed when I opened my sausage biz. 10 years and dozens of awesome sausage recipes later, this is still one of my all-time favorites to make and eat. I always think of this sausage in the fall when summer produce is peaking and the weather is just starting to turn. It is heavily seasoned with fresh green bell peppers and studded with big chunks of pork loin. Andouille is the cornerstone to many of the dishes I love to make most when the nights get colder – gumbo, jambalaya, and hearty and spicy stews. It is worth making a big batch of this at the start of fall to stock your freezer for winter meals.

Traditionally this sausage is smoked and fully cooked. I use my Traeger for these and they turn out perfectly. If you do not have a smoker, you can substitute some of the salt for smoked salt and cook them in the oven, directly on the oven racks at a low temperature. Purists may scoff, but I won’t judge.

If you are new to making sausage, I highly recommend you check out this detailed step-by-step guide: How to Make Sausage which covers sausage-making equipment and the details within each step of the process. This sausage variety really wants to be made into links. However, there is a lot you can do with fresh bulk andouille and I always enjoy making empanadas or stuffed zucchini with the little bit of bulk sausage that you end up with at the end of the sausage stuffer. If you want to skip the links part (because let’s be honest, not every kitchen is outfitted for twisting sausage links), you can make a small batch of this and enjoy it uncased in a million different ways.

If sausage-making is your thing, I will be posting more of my previously top-secret recipes from my days as a professional sausage maker on this site. Be sure to subscribe for recipes delivered straight to your inbox. Recipes that are on the docket to be released soon: Turducken Sausage, Maple and Sage Breakfast Sausage, Spicy Apple Breakfast Sausage, Chicken-Bacon-Chestnut Pate, Currywurst, Butifarra, Herbs De Provence Sausage, Chorizo Verde, Moroccan Chicken Sausage and many more.

Print
clock clock iconcutlery cutlery iconflag flag iconfolder folder iconinstagram instagram iconpinterest pinterest iconfacebook facebook iconprint print iconsquares squares iconheart heart iconheart solid heart solid icon

Andouille Sausage Recipe

5 Stars 4 Stars 3 Stars 2 Stars 1 Star No reviews
  • Author: Kara Taylor- Home Cooks Guide
  • Prep Time: 3 hours
  • Cook Time: 1-3 hours
  • Total Time: 0 hours
  • Yield: 10 lbs 1x
  • Category: Charcuterie
  • Method: Sausage Making
  • Cuisine: Cajun
  • Diet: Gluten Free
Print Recipe
Pin Recipe

Description

Andouille Sausage is a spicy smoked Cajun Link used in gumbo and jambalaya.  This version is studded with large chunks of pork loin and is seasoned with fresh green bell pepper, fresh onion, and celery salt for the unmistakeble cajun flavors of the “holy trinity” (aka cajun mirapoix).


Ingredients

Scale

Meat

9 lbs trimmed pork butt (or venison, pork mixture that is 70-75% lean)

1 lb diced pork loin (1/4–1/2 inch dice)

Dry-Spice Mix

10 grams curing salt #1 (aka “pink salt”, not to be confused with Himalayan Pink Salt which does not work here)

54 grams salt (if you don’t have a smoker, sub 1/2 of this salt for smoked salt)

6 grams celery salt

20 grams ground cayenne pepper

2 gram dried thyme leaves

6 grams ground allspice

3 grams mustard powder

4 grams sugar

Fresh Ingredients (Mince everything in food processor)

270 grams minced onion

30 grams minced garlic cloves

200 grams minced green bell pepper

Liquid Mix

1 cup water


Instructions

If you are new to sausage making, I recommend reading this post before beginning: How to make sausage

Measure and prep all your ingredients into different containers: 1) force meat (pork butt), 2) liquid ingredients (minced veggies and their juices + water), 3) spices mix 4) garnish (pork loin).

Combine the pork butt and dry-spice mix together, refrigerate.

Soak your sausage casings (if using natural casings) in water for at least 30 minutes or overnight.

Dice the pork loin into 1/4 inch to 1/2 inch chunks and refrigerate.  

Chill all your grinding and mixing equipment for at least 30 minutes.  While you are waiting for everything to chill, its a good time to do your first round of clean up.  For these next steps you will want a completely cleared and clean counter and a couple of sheet pans laid out for twisting sausage on.

Grind the pork butt and spices together into a chilled mixing bowl.

Transfer the ground meat mixture and the pork loin chunks to your mixer and begin mixing.  After about 1 minute, slowly add the minced peppers, onion, and garlic (and their liquid), and the chilled water with the mixer running and continue mixing for 4 more minutes after all ingredients have been added.  After the 5th minute, the sausage should look sticky or tacky.  If it doesn’t, keep mixing for a minute or two longer. Note: As long as the mixture is still nice and cold, you really cannot over-mix it.  You can however undermix it.

Transfer the meat to your sausage stuffer and fill and twist the casings (or skip this step for bulk sausage).  It’s helpful to shoot the stuffed sausages out onto a sheet pan to contain the mess.

Refrigerate the sausage uncovered for 1 day.  If you can, hang them in the fridge for the best result.

Preheat your smoker to 180-220 F.  Smoke the sausages until the sausages reach an internal temperature of 150-160.  Quickly submerge in ice water to cool and prevent shriveling.  Remove from the ice water after about 30 seconds and leave out for an hour or 2 to dry, then package and store, or cook and serve them as desired.


Equipment

Image of | Kitchen Aid 6 Qt Stand Mixer |

| Kitchen Aid 6 Qt Stand Mixer |

Buy Now →
Image of | Traeger Smoker and Grill |

| Traeger Smoker and Grill |

Buy Now →
Image of | Weston Manual Vertical Sausage Stuffer, 7 lb Capacity |

| Weston Manual Vertical Sausage Stuffer, 7 lb Capacity |

Buy Now →

Did you make this recipe?

Tag @homecooksguide on Instagram and hashtag it #homecooksguide

Filed Under: Gluten Free, How to, Meat, Sausage and Charcuterie, Smoker, Uncategorized Tagged With: cured, fall, jambalaya, Sausage, smoked, Summer, Winter

Gumbo: Simple, Delicious, Comfort Food for Cold Days

January 16, 2024

The links in these recipes are for products that I use and recommend.  

Sausage Gumbo served with white rice on a white bowl.
Sausage Gumbo served with rice.

Gumbo is comfort for me. During the summer and fall, I love filling this dish with fresh local vegetables at the peak of their flavor: tomato, okra, zucchini, green beans, green peppers. During the winter, I make this with canned tomatoes and vegetables from the freezer and I love the rich, spicy sauce on a cold day. In the spring, I make a version of gumbo loaded with greens like escarole, kale, and collards.

What is gumbo?

Gumbo is a thick Creole and Cajun stew of tomatoes, vegetables, and meat. The Creole version usually features sausage, shrimp, and okra. The Cajun version usually omits the okra and features a variety of meats. Gumbo is typically served with plain white long-grain rice like Jasmine Rice or Basmati. I also serve it over gritz.

Every cook has a handful of basic, flexible, and forgiving recipes that can be used to empty the kitchen of perishable produce and meat and gumbo is one of mine.

What gives Gumbo its Flavor?

The unique flavor of Gumbo comes from the dark cajun roux that is used to thicken it. You can make your own dark cajun roux or you can buy cajun roux (like SAVOIE’S Old Fashioned Dark Roux 32oz). Roux lasts forever in the refrigerator. 1/4 cup of dark roux will thicken about 3 quarts or 12 servings of Gumbo. This dark roux adds a toasty nutty flavor to the stew that is unlike anything else. There is no substitute for this.

A good home-made broth and Worcestershire sauce adds an umami-rich flavor even before any meat is added. You could leave the meat out in this recipe and have an incredibly delicious vegetable gumbo.

Sausage is often featured in Gumbo and the best sausages to use are Andouille. Andouille is a spicy smoked sausage. In my previous life, I was a professional sausage maker. My andouille sausage recipe is one of my all-time favorite recipes from this time in my life and I sorely miss having this sausage regularly on hand. If you are feeling ambitious, I highly recommend giving it a try. You can also make Gumbo with chicken, shrimp, crawfish, crab, shellfish, and any combination of these.

The vegetables that are always present in any gumbo are onion, celery, and green bell pepper. These are called the “holy trinity” or “cajun mirepoix” in chef’s lingo. After that, you can add other types of peppers, summer squash, okra, collard greens, swiss chard or kale, or green onion. Pretty much anything you have on hand will work!

Gumbo For Camping

I love to take sausage gumbo camping. It’s fun to catch fish, crawfish, or crab to add to it. It’s easy to heat and serve with instant rice. And it’s super satisfying on a cold night, especially if you spice it up with lots of Tabasco. Simply measure out about 3/4 cups of gumbo for each person on the trip into a ziplock bag and freeze it ahead of time. This will double as an ice pack to keep your cooler cold until you thaw and serve it. Pull it out of the cooler with enough time to thaw and reheat over a medium-low flame until simmering, stirring occasionally.

Print
clock clock iconcutlery cutlery iconflag flag iconfolder folder iconinstagram instagram iconpinterest pinterest iconfacebook facebook iconprint print iconsquares squares iconheart heart iconheart solid heart solid icon
Sausage gumbo and rice on white plate

Simple Gumbo Recipe

5 Stars 4 Stars 3 Stars 2 Stars 1 Star 5 from 5 reviews
  • Author: Kara Taylor- Home Cooks Guide
  • Prep Time: 20 minutes
  • Cook Time: 30 minutes
  • Total Time: 50 minutes
  • Yield: 3 quarts 1x
  • Category: Soup/stew
  • Method: Stove top
  • Cuisine: Cajun
  • Diet: Low Lactose
Print Recipe
Pin Recipe

Description

This is a flexible recipe for gumbo.  Customize it to the ingredients you have on hand.  This recipe makes enough for a party or multiple meals.


Ingredients

Scale

1–2 Tablespoons oil

1 1/2 large onions, diced

6 celery stalks, diced

3 green bell peppers, diced

7 cups diced/crushed fresh tomatoes OR peeled and seeded fresh tomatoes OR 4 14oz cans diced tomatoes

3 cups okra, green bean and/or summer squash (fresh or frozen)

2 cups diced green onion

1 cup diced collard greens, swiss chard or kale (optional)

1/2 Tablespoon ground cumin

1/2 Tablespoon dried thyme

1/2 cup Worcestershire

1/4 cup dark cajun roux

1–3 lbs diced chicken breast, diced chicken thighs, andouille or linguica sausage, cooked Chaurice sausage, shrimp, crab, and/or crawfish

salt to taste

1/2 cup water or broth


Instructions

In a large heavy bottom pot, heat 1-2 tablespoons oil and sauté the onions, celery, and bell pepper until tender.  If using cooked sausage, add it now as well.

Add the diced or crushed tomatoes, Worcestershire sauce, and water/broth.  Bring to a boil and then reduce to simmer.  

Add the okra and/or summer squash and bring it back up to a simmer.  Simmer for 5 minutes.

Add the dark cajun roux and stir until dissolved and stew thickens.  If you would prefer a thicker stew, add more roux.  Stir in the green onions.

At this point, add the diced chicken breast, shrimp, crab, or crawfish and cook until just finished, about 5 more minutes.  Alternatively, you could set aside a portion of this “Gumbo Base” to freeze for other meals and add the meat just to the portion you plan on serving tonight.  For my family of 4, I fill two 1-quart freezer zip lock bags with Gumbo Base to freeze and add 1 lb of meat to the remaining quart to serve that night.


Serve with plain long grain rice like basmati or jasmine.


Equipment

Image of | Lodge Pre-Seasoned Cast Iron Double Dutch Oven With Loop Handles, 5 qt |

| Lodge Pre-Seasoned Cast Iron Double Dutch Oven With Loop Handles, 5 qt |

Buy Now →

Did you make this recipe?

Tag @homecooksguide on Instagram and hashtag it #homecooksguide

Filed Under: Camping Recipes, Dairy Free, Meat, Soup, Uncategorized Tagged With: celery, dark roux, hot sauce, okra, onion, rice, stew

How To Make a Dark Cajun Roux

January 16, 2024

Dark roux cooling on a plate.
Dark Cajun Roux for Gumbo and Etouffee

What Is A Roux?

A roux (pronounced “Roo”) is a kitchen staple used to thicken a beef bourguignon, your grandma’s gravy, and a cajun gumbo. It is made by cooking flour with fat, usually butter or oil. In French cuisine, flour and butter are cooked together briefly until pale blond in color. This roux thickens without adding hardly any flavor. In Cajun cuisine, flour and oil are cooked together until a dark chocolatey color. This roux not only thickens but adds a toastiness to the dish that is the cornerstone of cajun flavor. A dark roux is the secret ingredient to a good gumbo, etouffee, and tomato gravy. Its that “spice” you cannot place. Its toasty bitterness acts similarly to dark chocolate in a good mole sauce.

A dark roux can take up to an hour of near-constant stirring. You can make a roux in the pot you are using to make gumbo and then add your cajun mirepoix (onion, celery, and green bell pepper) directly to it. However, it is such an investment of time, and focus to make a good dark cajun roux, that I prefer to make up a large batch ahead of time and add it to my gumbo towards the end of cooking. One batch of roux can make many batches of gumbo or etouffee and will keep in the refrigerator indefinitely.

Stages of a Roux

As a roux cooks it passes through several different stages of color and flavor. A white roux has a neutral flavor. A blond roux is buttery in flavor. A peanut butter-colored roux smells like popcorn. A copper-colored roux is rich and toasty. A chocolate-colored roux is dark and mysterious like voodoo magic; as hard to attain as it is to describe. A roux can go from perfect to burnt in a matter of seconds. It takes almost a trancelike focus to make a chocolate roux. It is a meditation.

This may sound intimidating, and it is. I’m not going to lie to you; I have burnt many large batches of roux after an hour invested in close supervision and stirring. Roux splatter burns are no joke either (use a long wooden spoon and wear long sleeves). The good news is that you can stop at a safer peanut butter or copper-colored roux (many chefs do), and still make an excellent gumbo or tomato gravy. You can work up to the chocolate-colored stage and with time and practice, you will achieve a perfect dark cajun roux.

Secret Tip to Making A Cajun Roux

The basic ratio to any roux is 1:1 oil to flour. As a roux cooks, it loses its thickening power and may separate out in your dish. If storing roux for later uses, you may find you have split roux with the oil on top. You can pour or scrape off this oil or you can add more flour at the very end of cooking, which is what I usually do. Adding more flour at the end replenishes depleted thickening power and ensures a velvety sauce that doesn’t have a layer of oil on the top. The roux is so hot at this point that the flour cooks instantly you don’t have to worry about any raw flour flavor compromising your perfectly toasty cajun roux. My final ratio is closer to 2:3 oil to flour.

Print
clock clock iconcutlery cutlery iconflag flag iconfolder folder iconinstagram instagram iconpinterest pinterest iconfacebook facebook iconprint print iconsquares squares iconheart heart iconheart solid heart solid icon
Dark Cajun Roux on plate

How To Make a Dark Cajun Roux

5 Stars 4 Stars 3 Stars 2 Stars 1 Star 5 from 1 review
  • Author: Kara Taylor- Home Cooks Guide
  • Cook Time: 45-60 minutes
  • Total Time: 45-60 minutes
  • Yield: 4 cups 1x
  • Category: Kitchen Staple
  • Method: Stove top
  • Cuisine: Cajun
  • Diet: Vegan
Print Recipe
Pin Recipe

Description

This dark roux is the cornerstone of Cajun Cuisine and is used to thicken and flavor gumbo, etouffee, tomato gravy, and beef gravy.


Ingredients

Scale

2 cups oil (with a high smoke point)

3 cups flour


Instructions

In a heavy bottom pan, stir together 2 cups flour and 2 cups oil.  Set a metal pan or container that holds 1 qt or more near by. 

Turn heat to medium and cook stirring every minute or so with a wooden spoon, making sure to get to the corners of the pan, until the roux reaches a peanut butter color and starts to smell like popcorn.

At this point, reduce the flame to low (2 out of 10 on your dial).  Stir constantly.

Continue cooking until your roux passes through the copper-colored stage and becomes a dark chocolate color.  Or stop at the copper-colored stage if you are unable to give your absolute full attention to it.  Your roux will become thick and chalky looking at this point.  That’s normal.  When you take it off the heat and let it sit it will become smooth and glossy again.

As soon as you reach your desired darkness, stir in another 1/2 – 1 cup flour.  This will add thickening power to your roux and drop the temperature a bit.  Carefully pour the roux into the metal container that you set nearby at the beginning of this process to prevent overcooking.

When the roux has cooled down a bit but is still soft, transfer this roux to a sterilized glass jar for long-term storage.

To use this roux, add 1 tablespoon at a time to a simmering liquid (gumbo, gravy, etc) while whisking until you reach your desired thickness.


Notes

CAUTION: Your roux will be incredibly hot and if it splatters on you it will stick to your skin.  Use a long wooden spoon, turn your pot handle in so it isn’t overhanging your stove, and be really careful stirring.  If you have little kids, do this at a time they won’t be hanging around with you in the kitchen.

If you try to transfer your hot roux directly to a glass jar without letting it cool a bit, thermal shock will likely cause your jar to crack and break and create a hot mess in your kitchen.

Did you make this recipe?

Tag @homecooksguide on Instagram and hashtag it #homecooksguide

Filed Under: How to, Pantry and Prep Staples, Soup, Uncategorized Tagged With: cajun, etouffee, gravy, gumbo, roux

Turkey Leg Confit – Make Ahead for an Easy Thanksgiving Day

November 8, 2023

The links in these recipes are for products that I use and recommend.  

Turkey confit is an indulgent preparation that turns a humble bird into a culinary masterpiece. Unlike the roasted turkey that graces many holiday tables, turkey confit is cooked slowly in fat (preferably duck fat), resulting in meat that is incredibly tender, moist, and infused with flavor. In this post, I’ll guide you through the steps of making turkey confit and share why this dish is so extraordinary.

What is Turkey Confit?

The word ‘confit’ is derived from the French word ‘confire’, which means “to preserve”. The confit cooking method was originally a means of preservation in the days before refrigeration. Meats were salted and then cooked at a low temperature in fat, and subsequently stored in that fat, creating an oxygen-free environment (before canning was discovered) unsuitable for most bacterial growth (see note below). Long ago, a family would keep a large vat of confit (game birds, chicken, pork, rabbit and even fish) in the larder and pull a piece or two as needed for a meal over a period of months.

Turkey confit, therefore, is turkey legs that have been seasoned, and then slowly cooked in fat at a low temperature. The result is a dish that’s incredibly rich and fall-off-the-bone tender.

Why Turkey Confit is Amazing

  1. Texture: The slow cooking process tenderizes the turkey meat to perfection. The meat is soft and can be easily shredded but with a slight crispness to the skin that is utterly delightful.
  2. Flavor: Cooking turkey in its own fat or a mixture of fats allows the flavors to marry and intensify over the hours of cooking, creating a depth of flavor that roasting often can’t match.
  3. Versatility: Turkey confit can be used in a variety of dishes – from sandwiches and salads to tacos, breakfast hash, and pasta. It’s not just for Thanksgiving!
  4. Preservation: While not as necessary today, confit is an excellent method for preserving turkey. The fat used for cooking acts as a seal that can keeps oxygen from reaching the meat the meat and spoiling it. This means that you can prep your Turkey legs for Thanksgiving well in advance and pop them in a hot oven 30 minutes before the meal for utterly perfect, fall-of-the bone, crispy-skinned turkey legs.
  5. Simplicity: Despite the lengthy prep and cooking time, the process is very hands-off. Once the turkey is prepped and in the oven, it requires little attention.

How to Make Turkey Confit

Making turkey confit is a simple yet rewarding process. Here’s a step-by-step guide to making your own.

Ingredients:

  • Turkey legs (thighs and drumsticks)
  • Salt
  • Sugar
  • Curing Salt (optional)
  • Herbs and Spices

Instructions:

  1. Seasoning Turkey: Weigh the turkey legs to calculate your salt and sugar. Use 10 grams salt (including Curing Salt#1 if using) and 2.5 grams sugar/brown sugar per pound plus herbs and spices as you like. Mix all the seasonings in a bowl first and then rub the turkey legs all over. The salt not only seasons the meat but also acts to draw out moisture, which helps in the preservation process. Don’t skimp on this part – the salt is crucial for both flavor, texture and food safety.
  2. Resting: Once seasoned, lay the legs in a single layer in a dish, cover with plastic wrap, and refrigerate. Let them sit for 3 days, turning over once during this time. This resting period allows the salt to penetrate the meat and work its magic.
  3. Rinsing: After the resting period, rinse the turkey legs under cold water to remove excess salt and pat them dry with paper towels.
  4. Preparing the Fat: Heat your chosen fat in a pot that’s just large enough to fit the turkey legs in a single layer. Warm the fat over medium heat until very warm 185-220 F (not frying temps).
  5. Cooking the Turkey: Preheat your oven to 185-200°F (93°C). Once the fat is warm, ladle it or pour it very carefully over the turkey. Make sure they are completely covered. If not, add more fat or oil until they are. Slide a wooden spoon or spatula down between the dish and the turkey to release any trapped air bubbles.
  6. Slow Cooking: Place the pot in the oven, uncovered, and cook for about 8 hours. This low and slow process is the key to confit.
  7. Checking Doneness: The turkey is ready when it’s incredibly tender to the touch, practically falling off the bone. With a sterile fork, stab the meat. The fork should slide right out with no resistance.
  8. Cooling and Storing (Optional): Allow the turkey to cool in the fat, then store it in the refrigerator submerged in the fat for up to a couple of weeks (or months if curing salt was used and it’s properly handled and stored). Alternatively, you can transfer the turkey to vacuum seal bags and ladle in some fat.
  9. Finishing: When ready to serve, remove the legs from the fat and wipe off excess. For crispy skin, sear the legs in a hot skillet or roast in a 450 F oven for 20 minutes or until golden brown and heated all the way through. Alternatively, turkey confit can be removed from the bone shredded and pan-fried for tacos or breakfast hash, or turned into rillettes for an appetizer.

If you are interested in making confit, you may find relevant and helpful tips on my post for duck conft.

Print
clock clock iconcutlery cutlery iconflag flag iconfolder folder iconinstagram instagram iconpinterest pinterest iconfacebook facebook iconprint print iconsquares squares iconheart heart iconheart solid heart solid icon

Turkey Confit

5 Stars 4 Stars 3 Stars 2 Stars 1 Star No reviews
  • Author: Kara Taylor- Home Cooks Guide
  • Prep Time: 3 days
  • Cook Time: 8 hours
  • Total Time: 80 hours
  • Yield: 2 turkey legs confit 1x
  • Category: Charcuterie
  • Method: Baking
  • Cuisine: French
  • Diet: Gluten Free
Print Recipe
Pin Recipe

Ingredients

Scale

10 lbs turkey legs (4–5 legs)

88 grams (10 Tablespoons Diamond Crystal Kosher) salt 

12 grams Pink Curing Salt #1 (optional, add this amount more of reg. salt if omitting)

24 grams (2 Tablespoons) brown sugar

Optional Herbs and Aromatics

4 grams (1 teaspoon) whole peppercorns

10–12 sprigs fresh thyme (no need to pick off the leaves)

5–10 fresh sage leaves

4 6″ inch sprigs of fresh rosemary

5 garlic cloves, crushed

zest of half a lemon/orange


Instructions

  1. Seasoning Turkey: Mix all the seasonings in a bowl and then rub the turkey legs all over. 
  2. Resting: Once seasoned, lay the legs in a single layer in a dish, cover with plastic wrap, and refrigerate. Let them sit for 3 days, turning over once during this time. 
  3. Rinsing: After the resting period, rinse the turkey legs under cold water to remove excess salt and pat them dry with paper towels.
  4. Preparing the Fat: Heat your chosen fat in a pot that’s just large enough to fit the turkey legs in a single layer. Warm the fat over medium heat until very warm 185-220 F (not frying temps).
  5. Cooking the Turkey: Preheat your oven to 185-200°F (93°C).  Arrange the turkey legs in an over proof casserole dish/hotel pan or pot.  They fit snugly in a single layer with at least 2 inches of free space above.  Carefully ladle or pour the warm/hot fat over the turkey. Make sure the legs are completely covered. If not, add more fat or oil until they are.  It’s ok to mix duck fat and olive oil if you are in a pinch.  Slide a wooden spoon or spatula down between the dish and the turkey to release any trapped air bubbles.
  6. Slow Cooking: Place the pot in the oven, uncovered, and cook for about 8 hours. This low and slow process is the key to confit.
  7. Checking Doneness: The turkey is ready when it’s incredibly tender to the touch, practically falling off the bone. With a sterile fork, stab the meat. The fork should slide right out with no resistance.
  8. Cooling and Storing (Optional): Allow the turkey to cool in the fat, then store it in the refrigerator submerged in the fat for up to a couple of weeks (or months if curing salt was used and it’s properly handled and stored). Alternatively, you can transfer the turkey to vacuum seal bags and ladle in some fat.  If you are not using the curing salt, you need to make an effort to cool this down quickly. See note below.
  9. Finishing: When ready to serve, remove the legs from the fat and wipe off excess. For crispy skin, sear the legs in a hot skillet or roast in a 450 F oven for 20 minutes or until golden brown and heated all the way through. Alternatively, turkey confit can be removed from the bone, shredded and pan-fried for tacos or breakfast hash, or turned into rillettes for a delicious appetizer.

Equipment

Image of | Lodge 3.6 Quart Enamel Cast Iron Casserole Dish with Lid (Carribbean Blue) |

| Lodge 3.6 Quart Enamel Cast Iron Casserole Dish with Lid (Carribbean Blue) |

Buy Now →
Image of | Ozeri Kitchen Scale |

| Ozeri Kitchen Scale |

Buy Now →
Image of | 2 1/2" Stainless Steel Hotel Pan |

| 2 1/2″ Stainless Steel Hotel Pan |

Buy Now →

Notes

Curing Salt and An Important Food Safety Note:

Curing salt is used to prevent botulism, a deadly toxin caused by the bacteria C. Botulinum that grows in room-temperate anaerobic, non-acidic environments.  It also gives the meat a rosy hue and cured meat flavor.  I like using curing salt, for peace of mind and because I think the meat tastes better with it. 

If you are concerned about nitrates or don’t want to purchase a special ingredient that you will rarely use, it is technically not necessary for food safety in this recipe provided that after the confit comes out of the oven, it passes through the danger zone (140-42 F) within 4 hours.  In my past life, when I was a licensed meat processor, I spent a lot of time logging cooling temps and times for charcuterie and I can tell you that cooling a vat of confit within this window is not as easy as it sounds.  Simply leaving the confit out on the counter to cool will not be sufficient for this size container to get the temp through this zone quickly enough.  If you put it directly in your refrigerator, you will warm your fridge, and the top layer of fat will solidify and insulate the interior.  You will need to leave it out in a cold garage for 2 hours and then transfer it to a not-too-full fridge.  Otherwise, please use the curing salt. 

Another option for quick cooling is to put the turkey leg in a vacuum seal bag while still hot/warm (use sterilized utensils and handle carefully as it is fragile when hot) with some fat, seal it, and then submerge the sealed bag in ice water.

Did you make this recipe?

Tag @homecooksguide on Instagram and hashtag it #homecooksguide

Filed Under: Appetizer, Dairy Free, Entertaining, Food Safety, Gluten Free, Kid Friendly, Meat, Sausage and Charcuterie, Tips and Tricks, Uncategorized Tagged With: confit, Dairy Free, dinner party, fall, Gluten Free, Holiday, Thanksgiving, Winter

The Most Delicious Roast Chicken In the World

September 27, 2023

The links in these recipes are for products that I use and recommend.  

A perfectly cooked roast chicken is a thing of beauty. The ultimate comfort food. It seems like a simple thing but it is deceptively difficult to achieve. Why is it so hard? The ideal thigh temperature is 185 F or higher. The ideal breast temperature is 150-165 F. If you cook your chicken (or turkey) on a rack in a pan, the breast always cooks faster and dries out before the thighs reach their optimal temperature. If you cook the chicken breast to perfection, the thighs are still bloody, or tough. I’ve come up with a simple solution to this challenge (hint: do not cook your bird on a rack) plus instructions on how to get it perfectly seasoned all the way through. You will need a couple of things for this method. Things that you should already have in your kitchen, but if you don’t it’s time to invest in them.

You need:

A kitchen scale, (or you’ll need to do some math).

A leave-in probe thermometer

A cast iron brazer or (if you need to substitute) a medium oven-proof heavy-duty frying pan

The Steps:

  1. Dry brine your roast. Rub the bird all over (especially under the skin of the breast and inside the cavity) with salt and seasonings at least 8-24 hours before cooking it and leave it uncovered in the fridge to dry. For the seasonings use 3 grams of salt and 1 gram of sugar per pound of bone-in chicken, plus any other dry seasonings you want.
  2. Stuff the cavity loosely with onion, celery, and other aromatic herbs and vegetables.
  3. Tie the legs together with kitchen twine
  4. Place empty brazer/frying pan in the oven and preheat oven to 375 F
  5. Once preheated, remove the pan and add 1-2 T oil. Add the chicken, it should sizzle in the pan when you do, rub oil over the top.
  6. Insert the probe of your leave-in thermometer into the center of the breast and set the alarm to sound at 150 F. Yes, I mean it, 150 F (not 165 F).
  7. Rotate the pan with the bird in it at least once during cooking, especially if you do not have convection.
  8. When the alarm sounds, remove the bird from the pan and transfer it to a cutting board. Do not cut it or remove the thermometer yet. Let the bird sit for at least 10 minutes while you make a delicious gravy or sauce with the browned drippings stuck to the bottom of the pan.
  9. After 10-15 minutes, cut the bird and serve it.

A note on cooking time. People always want to know how long something will take to cook but there are simply too many variables that it is impossible to give a precise time. Variables like how powerful your oven is, convection or no convection, how many times you open the oven door to admire it, and how full you pack the cavity or the pan. If you want a perfectly cooked roast, just use a leave-in probe thermometer and take the guesswork out of it. That being said, for a ballpark time so you can plan out the rest of your meal prep, I made this recently in a very weak oven with no convection and it took about 2 hours for a 5 lb bird. In a professional oven with convection, it would probably take about 1 1/4 hours.

Print
clock clock iconcutlery cutlery iconflag flag iconfolder folder iconinstagram instagram iconpinterest pinterest iconfacebook facebook iconprint print iconsquares squares iconheart heart iconheart solid heart solid icon

The Most Delicious Roast Chicken In the World

5 Stars 4 Stars 3 Stars 2 Stars 1 Star No reviews
  • Author: Kara Taylor- Home Cooks Guide
  • Prep Time: 10 minutes + 8 hours or more
  • Cook Time: 1 1/4 to 2 hours
  • Total Time: 0 hours
  • Yield: 4 servings 1x
  • Method: Roasting
  • Diet: Gluten Free
Print Recipe
Pin Recipe

Description

Cooking a perfect roast chicken is a skill all home cooks should have in their back pocket.  This recipe makes it easy.  The same technique can be used for your roast turkey.


Ingredients

Scale

1 5 lb whole chicken, patted dry (see note if your bird does not weigh 5 lbs)

15 grams salt (2 1/2 teaspoons, fine)

5 grams sugar (1 heaping, fine)

Optional Seasonings to taste:

Herbs de Provence

Black pepper

Paprika

Garlic Powder

a couple of sprigs each: fresh thyme, fresh sage, rosemary, etc

1/2 medium onion, cut into a couple of 1-inch wedges

3 smashed garlic cloves

1/4 medium carrot, cut lengthwise and then in half crosswise

1 celery stalk, cut lengthwise and then in half crosswise


Instructions

  1. 8-24 hours before cooking the bird

    1. In a small bowl, combine all your dry spices.  Rub the bird all over (especially under the skin of the breast and inside the cavity) with the salt and seasonings.
    2. Stuff the cavity loosely with onion, celery, and other aromatic herbs and vegetables.  Any extra onion, celery can be added to the pan so don’t feel like you have to overstuff it.
    3. Tie the legs together with kitchen twine. Place the chicken in the fridge uncovered. 

Approx 2 1/2 hours before dinner time

    1. Place empty brazer/frying pan in the oven and preheat oven to 375 F
    2. Once preheated, remove the pan and add 1-2 T oil. Add the chicken breast side up, it should sizzle in the pan when you do, rub oil over the top. Add a couple of chunks of onion, carrot, and celery to the pan around the chicken (not under it) if you want to (but don’t fill it up too much and slow the cooking)
    3. Insert the probe of your leave-in thermometer into the center of the breast and set the alarm to sound at 150 F. 
    4. Rotate the pan with the bird in it at least once during cooking, especially if you do not have convection.
    5. When the alarm sounds, remove the bird from the pan and transfer it to a cutting board. Do not cut it or remove the thermometer yet. Let the bird sit for at least 10 minutes while you make a delicious gravy or sauce with the browned drippings stuck to the bottom of the pan.  Do not rush this 10-minute resting period.  It is critical not only for flavor and texture but also for food safety.
    6. After 10-15 minutes, cut the bird and serve it. Since you’ve left the thermometer in, you’ll notice that the temperature has risen to 160-165 F which is plenty safe.  


Equipment

brazier

Buy Now →
Image of | Ozeri Kitchen Scale |

| Ozeri Kitchen Scale |

Buy Now →

Notes

Spices

In this recipe, I included my go-to traditional roast chicken spice mix.  You can flavor your chicken any way you want.  Try Chinese 5 spice for an Asian twist or Cumin-Ancho-Oregano-Garlic Powder for Mexican.  Just don’t mess with the salt and sugar.  

Don’t Leave the Thermometer Probe against the bone

I stick the probe into the center of the breast until it hits bone and then I back it out about 1/2 -1 inch.  Bone conducts heat differently than meat does.  You’ll get an inaccurate read if you leave the tip of the probe in contact with the bone.

Can I use an Instant Read Thermometer

I don’t recommend it.  An instant-read thermometer requires constantly opening the oven and poking holes in your roast.  Holes that allow all the flavorful juices to escape and the likelihood that you will miss the exact perfect moment to take the bird out of the oven is pretty high. 

If you don’t have a leave-in Probe Thermometer, you are better off cooking your bird to 185 F or higher in the breast (until the thighs wiggle easily in their sockets).  It will be fork-tender and delicious, but not really juicy. Just whatever you do, don’t let the finished breast temperature be between 168-180 F.  That’s the dry dead zone.

If your bird is not 5 lbs.

Weigh your bird or note the total weight of your bird before you throw the packaging away.  Multiply that weight (in lbs) by 3 for grams of salt and by 1 for grams of sugar.  If you don’t have a scale, use the salt and sugar labels to calculate how many grams are in a teaspoon and then calculate the total amounts from there.  

Did you make this recipe?

Tag @homecooksguide on Instagram and hashtag it #homecooksguide

Filed Under: Dairy Free, Entertaining, Gluten Free, Kid Friendly, Kitchen Basics, Meat, Tips and Tricks, Uncategorized Tagged With: chicken, fall, roast, Spring

Make delicious and easy homemade yogurt!

February 21, 2023

The links in these recipes are for products that I use and recommend.  

Making your own yogurt at home is an easy and surprisingly forgiving process. Generations of industrial food consumption have convinced us that some foods, most foods, need to be made by professionals in commercial kitchens and rigorously controlled environments. I take issue with this thinking, and as a rule of thumb, frequently remind myself that anything humans have been making for thousands of years without special equipment or sanitation can be made in my own kitchen. And you can make it too, I promise. This is the way with fermented pickles, yogurt and cheeses, wild-yeasted bread, and some basic charcuterie and meat preservation.

Making yogurt is a way to preserve milk and extend its shelf-life

I buy milk from Costco, two gallons at a time in my house. Every so often, sickness or vacation will disrupt our normal milk consumption and leave me staring down the expiration date on a glut of milk in my fridge. And when that happens, I extend its shelf life by making yogurt (and sometimes, ricotta).

Milk is truly a fascinating thing. Having young kids, I have had years to observe and ponder this unusual pearly substance in its many forms; the sippy cup abandoned behind the couch for days before it is found, milk mixed with stomach acid before being…. well never mind that’s gross. Did you know that if you do nothing but leave a cup of milk out overnight it will “sour” and thicken and turn into yogurt? Even after it is pasteurized and all the natural bacteria and enzymes in the milk have been killed! How? Turns out it takes a special enzyme to break down lactose. An enzyme that most bacteria take a while to develop or produce except the abundant lactobacillus. This gives lactobacillus a head start from all the other microbes that may cause you trouble and during that headstart lactobacillus digests the sugar in lactose and increases the acidity of the milk (“souring”) making it harder for bad microbes to grow in it then too. It’s like milk comes with a built-in preservation system.

And what is really incredible…what keeps me up at night considering our place in the universe is this: If it weren’t for us humans doing strange things with foods that no other animals do (removing milk from a mother’s body of another species and storing it, harvesting and milling grass seeds, juicing fruit, chopping and salting meat and then packing it into an intestine and hanging it for a long time, etc), these microbes would never have a chance to perform their greatest magic tricks. It makes me wonder if the bacteria are working for us, or us for them, or if it’s just a coincidence that all the pieces found each other. And all these amazing bacteria that effortlessly turn the milk into yogurt and cheese, (and make wine and beer, soy sauce and kimchi, etc), they are all just sitting invisibly on nearly every surface in your kitchen and garden and floating through the air we breathe, just waiting to go to work! Now, I’ve heard people (vegans) tell me that it is unnatural to drink another animal’s milk because no other animal does it. I am not convinced.

Here’s another interesting thing about milk and lactose. Most adults worldwide lack the enzyme that breaks down milk (lactose intolerant). Only in Northern Europeans and Scandanavians and their descendants is lactose tolerance the norm. But fortunately for the majority of lactose intolerant adults, bacteria in yogurt do the work for us, both in the yogurt and in our bodies! Lactose is water soluble so it lives in the watery part of milk, aka the whey. When yogurt (or cheese) is drained and the curds are separated from the whey, most of the lactose is removed and what remains gets broken down by the bacteria. Greek Yogurt is extra thick and creamy because the whey is drained out of it. This is why lactose-intolerant adults can usually tolerate cheese and yogurt.

The Yogurt-Making Process

The process of making yogurt is simple. First, milk is heated to a low simmer, 180F-206F. This effectively kills any undesirable bacteria that may be in it. Meanwhile, sanitize all the utensils and containers that you will be using in a hot oven or pot of boiling water. Once the milk has been heated, then you cool the milk down to approximately 110 F, the ideal temperature for the good bacteria that you are going to add. Inoculate the milk with the good bacteria, aka a yogurt starter. You can use store-bought or homemade live probiotic yogurt from your fridge or even probiotic capsules (emptied), or you can purchase a special heirloom yogurt starter. Let the milk and starter sit in a warm place for 4-12 hours to thicken. Strain to thicken more, if you want to. Refrigerate and enjoy for up to 10-14 days.

I use an Instapot to make yogurt. My Instapot has a yogurt-making setting that maintains the ideal temperature for the 4-12 hours that it takes to thicken the yogurt. This makes it downright impossible to mess up but does extend the prep time by 1-2 hours because it takes so long to heat the milk and cool it back down. If you don’t have an Instapot, no worries, you can make yogurt in a covered heavy pot, and a warm place like a sunny counter, a warm (but not hot) oven, or next to your fireplace.

A note on sanitation

You may be wondering, if milk will turn to yogurt without doing anything, why bother with heating and cooling milk and trying to maintain a warm temperature? That’s a fair question. The answer: with a minimal amount of intervention, you will end up with a better-tasting and safer final product. The strains of bacteria that create yogurt originated from the warm climates of the Middle East, Mediterranean, North Africa, and India where milk would spoil quickly if left out. These bacteria are thermophilic (heat-loving) and produce a tart, thick product relatively quickly in temperatures up to 113 F. The strains of bacteria that make buttermilk, creme fraiche, and sour cream are mesophilic. They like cooler temperatures, 85 F is ideal but cooler is ok too, and those products ripen over longer periods of time in places where the milk goes bad more slowly because it is colder. The window of time that milk is unrefrigerated but not yet acidified by the bacteria, is an opportunity for undesirable bacteria to gain a foothold and create off flavors or worse. We heat the milk to destroy any undesirable bacteria that may be present in the milk before make yogurt. We sanitize storage containers and utensils to ensure that we don’t introduce pathogens into a safe finished product. Salmonella and e.coli may not have any effect on the yogurt-making process or taste, and yogurt may not be its ideal environment for growing, but it could still make you sick if it happens to be in it. If you travel to India or Africa, you will likely encounter yogurt that was made the old fashion way without sanitizing utensils or heating the milk, even using raw milk… and, not surprisingly many travelers get sick. And not just travelers get sick, locals do too. In short, the goal of fermented foods is to apply some control over which strains of bacteria get in, it’s not a free for all, and heating the milk and sanitizing utensils will ensure that.

Print
clock clock iconcutlery cutlery iconflag flag iconfolder folder iconinstagram instagram iconpinterest pinterest iconfacebook facebook iconprint print iconsquares squares iconheart heart iconheart solid heart solid icon

Homemade Yogurt

5 Stars 4 Stars 3 Stars 2 Stars 1 Star No reviews
  • Author: Kara Taylor- Home Cooks Guide
  • Prep Time: 2 hours
  • Total Time: 10
  • Yield: 8 cups 1x
  • Category: Dairy
  • Method: Fermented/Cultured
  • Cuisine: World
  • Diet: Gluten Free
Print Recipe
Pin Recipe

Description

Homemade yogurt is surpringly easy to make and a great way to extend it’s shelf life.


Ingredients

Scale

8 cups milk (any type, see note)

1/2–1 cup heavy cream (optional)

2 Tablespoons Store bought or home-made Yogurt with live active bacteria (see note)


Instructions

1) Fill a large pot 1/2 full of water, submerge your storage containers and any utenisiles you plan to use (tongs, heat proof spatulas, whisk, or measuring cup with spout, large spoons).  Bring this pot of water to a boil.  Dip your thermometer probe into the boiling water for a couple of seconds.  Remove all utensiles from the pot (I use tongs for this) and transfer them to a clean towel on the counter to air dry.  Meanwhile:

If Using an InstaPot to Make Yogurt

Make sure all parts are clean, including the lid and gasket.

Pour the milk into the inner pot. Cover it but leave the vent open.  Set the Instapot to “Yogurt” and adjust to the highest position “Boil”.  It will begin to heat the milk.  This will take about 1 hour.  It will beep and turn off when it has “sufficiently” heated.  Open the Instapot (it may not be actually boiling), stir the milk and either use your probe thermometer to check the temperature or (if you don’t have one, and I highly recommend you do) visually inspect that the milk is actively steaming.  It should be 180 F or higher.  You may need to extend the heating time for another 5 or 10 minutes.

Now, pour about 1 cup of milk into a liquid measuring cup and remove the inner pot and place it on the counter or on your burner with the burner off to expedite cooling.  Let the milk cool back down to 110 F.  This will take about another hour.  If you want to speed it up, you can place the pot into a larger pot with ice water and stir the milk occasionally. 

The 1 cup of milk that you set aside in the measuring cup will cool faster than the large pot.  Once that has cooled to 110 F, stir the yogurt into the 1 cup of milk to inoculate it, and let it sit while you wait for the rest of the milk to reach the target temperature.

When the large pot of milk has reached 110 F, stir in the cup of inoculated milk.  Place the milk back into the InstaPot, cover it the vent open, and set it to “Yogurt” for 4-10 hours.  The longer it sits the tangier it will be.

If Using the Stove Top:

Pour the milk into a pot (approx 4 quart size) with a lid. If you have a ceramic enameled cast iron brazier or dutch oven, that will work the best as it maintains a warm temperature over a longer period of time.  Cover the pot and bring it to a low simmer over medium heat.  If you boil the milk over high heat it will likely scald on the bottom.  Check the milk every 5-10 minutes, stirring gently and checking the temp.  If you do not have a probe thermometer, see note below.  When it reaches 180 F, remove the milk from the heat.

Now, pour about 1 cup of milk into a sterilized liquid measuring cup and set aside.  Let the milk in the pot cool back down to 110 F.  This will take about another hour depending on the pot used.  If you want to speed it up, you can place the pot into a larger pot with ice water and stir the milk occasionally.  

The 1 cup of milk that you set aside in the measuring cup will cool faster.  Once that has cooled, stir in the yogurt and let it sit while you wait for the rest of milk to cool.

When the large pot of milk has reached 110 F, stir in the cup of milk that you inoculated with yogurt bacteria.  Cover the pot.  Place it in a warm place (in front of sunny window, on your hearth, or a warm but not hot oven that has been turned off) or if you don’t have any of those things, wrap the covered pot in a couple of bath towels to insulate it. Let this inoculated milk sit for 6-12 hours.  The longer it sits the tangier it will be.

3) Store your yogurt in the fridge for up to 14 days.

Home-made yogurt in the Instapot.

After 6-12 hours, the milk will be thick.  You should be able to lift a spoonful out and it will maintain its shape.  You can either strain it through a fine mesh sieve for Greek Style yogurt (several hours or overnight in the fridge) or whisk it vigorously to smooth out any lumps and transfer it right away to your sterilized containers.  Cover and refrigerate the yogurt for up to 14 days.  It will continue to get tangier in the fridge.


Equipment

Image of | ThermoPro Dual Probe Meat Thermometer |

| ThermoPro Dual Probe Meat Thermometer |

Buy Now →

Notes

Selecting Milk For Yogurt

You can use any kind of lactose milk: cow, sheet, goat, etc.  You can use skim, lowfat, whole milk and cream.  My preferred combo is 8 parts whole milk and 1 part heavy cream.  You can substitute about 25% of milk for milk alternatives like soy or coconut milk without making changes to this recipe.

It is possible to make yogurt from soy or coconut milk and other milk alternatives using probiotic capsules or yogurt cultures but it behaves a little differently and this recipe is not really applicable to milk alternatives.  Cultures for Health is a great site for purchasing all different cultures and has information about “Alternative Milks for Making Yogurt“.

Selecting your Yogurt Culture

Your yogurt starter should include lactobacillus bulgaricus and streptococcus thermophilis.  The easiest method is to use your favorite store-bought yogurt as your inoculum.  You can then use your own batch of yogurt to inoculate the next batch that you make.  Store-bought yogurt is readily available.  You just need to make sure that it is unflavored and that it “contains live active bacteria” versus “is made with live active bacteria”.

You can also use heirloom yogurt starters, gifted from friends or purchased by specialty stores like Cultures for Health.  These starters may be specific to a certain geographic region or family.  If you strain your yogurt through a cheesecloth or towel, you can dry the towel without washing it (just a quick rinse with cold water) and then use it to inoculate milk.

You can use probiotic capsules that contain lactobacillus bulgaricus and streptococcus thermophilus.  Other yogurt-making bacteria include lactococci, lactobacillus delbrueskii, lactobacillus fermentum, lactobacillus casei, and lactobacillus brevis.  Probiotic capsules also contain other strains of bacteria that are known to survive the human digestive system and provide health benefit to us but are not known to make the best tasting or creamiest yogurt: bifidobacteria (from breast milk- acidifies the stomachs of infants before stomach acid is produced), lactobacillus plantarum (makes fermented pickles), lactobacillus acidophilus (native to the intestinal tract) and Lacticaseibacillus rhamnosus (native to the urogenital tract).  If you use probiotic capsules make sure that they contain primarily probiotics that turn milk into yogurt and be aware that the end product will be healthful but perhaps not as delicious as it could be if you used only yogurt-making species.

If you do not have a probe thermometer:

If you do not have a probe thermometer, you will need to use your senses to check the milk’s temparature.  At 180 F, the milk will be steaming even after you stir it.  When left alone, it will be slowly moving in the pot from convection, but not boiling. 

Liquid at 110 F is the temperature of an extra-hot hot tub.  Check the milk by touch without contaminating it.  Wash your hand very thoroughly.  You know, sing the Happy Birthday Song, hot water, lots of soap, scrub scrub scrub.  Then you either can dip your knuckle in it (not your finger because bacterial is hard to completely remove from under your fingernails).  Or you can pour a spoonful over the back of your very clean hand.

I highly recommend having a probe thermometer.  Mine is one of my most used kitchen tools.

Did you make this recipe?

Tag @homecooksguide on Instagram and hashtag it #homecooksguide

Filed Under: Appetizer, Breakfast, Budget Bites (under $2), Condiments, Accoutrements, Pickled Things, Gluten Free, How to, Kid Friendly, Kitchen Basics, Pantry and Prep Staples, Tips and Tricks, Uncategorized

Easy, Crispy, Hot Wings in the Oven!

February 10, 2023

Get Ready for Game Day

I’ve been craving bar food lately. Specifically, perfectly crispy Buffalo Hot Wings with Blue Cheese dip and celery. I think I must be feeling a little nostalgic about that time in my life, pre-covid and pre-baby, when I would venture out to bars to watch the game with my husband or decompress with my co-workers after a long hard shift. These Crispy Buffalo Wings satisfy this craving.

I know air fryers are all the rage right now, and before that, it was the Fry Daddy. Both those devices would undoubtedly make nice crispy wings, but if you’ve been reading this blog you know I have an aversion to special kitchen gadgets. Less is more, especially when you’re kitchen is small. I’m not dissing the air-fryer, I’ve never used one (never felt the need), but you don’t need anything but your regular old household oven to make these perfectly crispy hot wings.

These wings are perfect for Game Day, Superbowl Sunday, casual dinner parties, and cookouts or just because.

Tips for Crispy Oven Chicken Wings

Crank up the heat

Home ovens are not as powerful as commercial ovens and they recover their heat slowly after opening the oven door. If you want to crisp something up like chicken skin or get a nice charring effect on roasted veggies, you need to turn your oven up high to 450-550 F and use convection if you have it. If you have it, convection should be used for everything (except baking cakes).

I use a standard mid-grade GE oven at home. One that I think represents average heat recovery, insulation, and power for home ovens. If you are using a Viking or Wolfe or something really powerful, you will want to adjust your cooking time down a bit. If you are using a really old, poorly insulated, non-convection oven, adjust your cooking time up and refrain from opening the door unnecessarily.

Use Air-Chilled Chicken

Air Chilled Chicken tends to be a higher-end product, often used with free-range and organic birds. It may be more expensive but you’re not paying for added water weight, and the drier skin crisps up better when cooked. If you are using conventional non-Air-Chilled Chicken, it is especially important to pat the wings down well with paper towels and leave them in the fridge uncovered for at least a couple of hours or a day to dry.

Frozen chicken wings are often sold with the directions “to cook straight from frozen”. Don’t do this if you want crispy wings (and who doesn’t). When frozen meat thaws, the ice crystals break down into free water which has been pulled out of the muscle. If you cook directly from frozen, this process will happen in your oven and cause you to steam your wings instead of roast them. You will never get crispy by steaming. If you buy frozen wings, thaw them first a day or two prior to cooking, pat them dry once completely thawed, and leave them uncovered for at least a couple of hours or a day in the fridge.

Variations

There is something magical about the Classic Buffalo flavor combo, just the right amount of heat, with the cooling blue cheese and refreshing, palate-cleansing celery…. but variety is the spice of life. So if you are in the mood to venture away from Classic Buffalo, try substituting Frank’s Hot Sauce in the Classic Buffalo Sauce with:

  • Dijon and Honey
  • Siracha
  • BBQ Sauce
  • Sweet Chili Sauce
  • Jamaican Jerk Spice Mix (mixed with butter)
  • Mojo (Cuban citrus sauce)
  • Teriyaki
  • Yuzu

If you try this recipe out, please be sure to give it a star rating. Google loves star ratings and it will help more people find it😉.

Print
clock clock iconcutlery cutlery iconflag flag iconfolder folder iconinstagram instagram iconpinterest pinterest iconfacebook facebook iconprint print iconsquares squares iconheart heart iconheart solid heart solid icon

Crispy Hot Wings. No special equipment needed.

5 Stars 4 Stars 3 Stars 2 Stars 1 Star 5 from 6 reviews
  • Author: Kara Taylor- Home Cooks Guide
  • Prep Time: 2 hours
  • Cook Time: 30 minutes
  • Total Time: 2 hours 30 minutes
  • Yield: 4 appetizer servings 1x
  • Category: Appetizer
  • Method: baking
  • Cuisine: American
Print Recipe
Pin Recipe

Description

This recipe makes perfectly crispy chicken wings in the oven.  Adjust the heat by using your favorite hot sauce.  


Ingredients

Scale

2 lbs dry chicken wings (see note)

salt

1 cup flour

3 Tablespoons Hot Sauce (Franks, Tobasco, other)

1 1/2 Tablespoon Butter

1 Tablespoon minced celery leaves and stalk for the innermost core of celery

1/2 cup your favorite blue cheese dip


Instructions

Sprinkle the wings with salt and leave uncovered for a couple of hours

Preheat the oven to 500 F.

In a mixing bowl, toss the wings with flour.  Place the wings in a sieve and shake off the excess flour.  You may need to do this in a couple of batches depending on how big your sieve is.

Spray a sheet pan with cooking spay.  Place the wings on the sheet pan.  Lightly spray them with cooking spray too.  Place the pan in the oven.

Bake for 15 minutes and then spin the sheet pan.  Bake for another 15 minutes or longer until nice and crispy.  If your oven is not convection and is going real slow, you may want to remove the pan (close the oven fast), flip the wings over, and place back in the oven.

While the wings are baking, add the hot sauce and butter to a microwave safe mixing bowl, and heat the sauce.  When the wings come out of the oven, immediately toss them with the buttery hotsauce.

Transfer these wings to a plate, sprinkle with the minced celery leaves (the tender green/yellow ones from the heart of the celery) and serve with your favorite blue cheese dressing.

Enjoy!


Did you make this recipe?

Tag @homecooksguide on Instagram and hashtag it #homecooksguide

Post originally published March 2021.

Filed Under: Appetizer, Entertaining, Meat, Tips and Tricks, Uncategorized Tagged With: bar food, Buffalo Wings, crispy chicken, party, spicy, super bowl, wings

Simple Potato and Collard Greens Soup with Linguica (Caldo Verde)

February 3, 2023

This Potato and Collard Greens Soup is simple, economical, and full of flavor and nutrients. Served with crusty bread, a drizzle of olive oil, and minced malagueta peppers (or your favorite hot sauce) it is perfect for a weeknight dinner.

Caldo Verde’s (or Green Soup) origin is in Portugal, where it is considered by many to be the National Dish. Variations of this dish can be found in Brazil and parts of Africa, where collard greens are a staple food and the Portuguese imposed their culture (and culinary traditions) during colonization.

I love Collard Greens, tough and bitter as they can be. These greens are packed with nutrients and it’s worth acquiring the taste for them if you haven’t already. If you are new to collard greens or looking for more collard green dishes that you might like, try Couvé: Quick and Easy Collard Greens, the Brazilian Way, and Southern Braised Collard Greens with Bacon: American Comfort Food At It’s Best!

Variations to try:

  • Keep the potatoes in chunks instead of semi-pureed/ mashed.
  • Use kale instead of collards or a combination of greens (kale, chard, and collards). Kale and Swiss Chard will cook a bit faster than collards.
  • Use different sausages: linguica, chouriçe, Spanish dry chorizo, and andouille are all good substitutes.
  • Go vegetarian – omit the sausage altogether.
Print
clock clock iconcutlery cutlery iconflag flag iconfolder folder iconinstagram instagram iconpinterest pinterest iconfacebook facebook iconprint print iconsquares squares iconheart heart iconheart solid heart solid icon

Simple Potato and Collard Greens Soup with Linguica (Caldo Verde)

5 Stars 4 Stars 3 Stars 2 Stars 1 Star No reviews
  • Author: Kara Taylor- Home Cooks Guide
  • Prep Time: 5 minutes
  • Cook Time: 45 minutes
  • Total Time: 50 minutes
  • Yield: 6–8 servings 1x
  • Category: Soup
  • Method: Boiling
  • Cuisine: Portuguese
  • Diet: Gluten Free
Print Recipe
Pin Recipe

Description

A Portuguese and Brazilian soup of collard greens or kale and smokey, spicy linguica sausage in a hearty broth thickened by potatoes.


Ingredients

Scale

1-2 tablespoons olive oil or dende (palm oil)

8-10 cups chicken, pork or vegetable broth

1 lb linguica sausage, cut into rounds.

1 large onion, diced

5 garlic cloves, minced

6 Yukon Gold potatoes, diced.

1 tablespoons salt plus more to taste

1 teaspoon dry thyme

2 bunches of collard greens (or 10-12 large leaves), sliced thin and chopped.

Malagueta Peppers or your favorite hot sauce


Instructions

1. In a soup pot, 4 quarts or bigger, heat the oil and brown the sausage. Use a slotted spoon to transfer the sausage to a plate and set it aside for later.


2. Sauté the onion in the oil for 3-4 minutes. Add the garlic and sauté for another 1-2 minutes.


3. Add the broth, potatoes, salt, bay leaves, and dried thyme. Simmer for 20 minutes or until potatoes are very tender and starting to break apart. You may choose to use a potato masher or immersion blender to further break down the potatoes.


4. Add the chopped collard greens and cook for another 3-5 minutes.


5. Taste and season with salt and pepper. Add the linguica back in or serve with the linguica on top as a garnish. To spice it up, stir in chopped malagueta peppers or use your favorite hot sauce.


Did you make this recipe?

Tag @homecooksguide on Instagram and hashtag it #homecooksguide

Filed Under: Appetizer, Budget Bites (under $2), Busy Weeknight, Dairy Free, Gluten Free, Soup, Uncategorized

  • « Go to Previous Page
  • Page 1
  • Page 2
  • Page 3
  • Page 4
  • Interim pages omitted …
  • Page 14
  • Go to Next Page »

Secondary Sidebar

Copyright© 2026 · 2020 - Home Cooks Guide

Manage Consent
To provide the best experiences, we use technologies like cookies to store and/or access device information. Consenting to these technologies will allow us to process data such as browsing behavior or unique IDs on this site. Not consenting or withdrawing consent, may adversely affect certain features and functions.
Functional Always active
The technical storage or access is strictly necessary for the legitimate purpose of enabling the use of a specific service explicitly requested by the subscriber or user, or for the sole purpose of carrying out the transmission of a communication over an electronic communications network.
Preferences
The technical storage or access is necessary for the legitimate purpose of storing preferences that are not requested by the subscriber or user.
Statistics
The technical storage or access that is used exclusively for statistical purposes. The technical storage or access that is used exclusively for anonymous statistical purposes. Without a subpoena, voluntary compliance on the part of your Internet Service Provider, or additional records from a third party, information stored or retrieved for this purpose alone cannot usually be used to identify you.
Marketing
The technical storage or access is required to create user profiles to send advertising, or to track the user on a website or across several websites for similar marketing purposes.
  • Manage options
  • Manage services
  • Manage {vendor_count} vendors
  • Read more about these purposes
View preferences
  • {title}
  • {title}
  • {title}
Manage Consent
To provide the best experiences, we use technologies like cookies to store and/or access device information. Consenting to these technologies will allow us to process data such as browsing behavior or unique IDs on this site. Not consenting or withdrawing consent, may adversely affect certain features and functions.
Functional Always active
The technical storage or access is strictly necessary for the legitimate purpose of enabling the use of a specific service explicitly requested by the subscriber or user, or for the sole purpose of carrying out the transmission of a communication over an electronic communications network.
Preferences
The technical storage or access is necessary for the legitimate purpose of storing preferences that are not requested by the subscriber or user.
Statistics
The technical storage or access that is used exclusively for statistical purposes. The technical storage or access that is used exclusively for anonymous statistical purposes. Without a subpoena, voluntary compliance on the part of your Internet Service Provider, or additional records from a third party, information stored or retrieved for this purpose alone cannot usually be used to identify you.
Marketing
The technical storage or access is required to create user profiles to send advertising, or to track the user on a website or across several websites for similar marketing purposes.
  • Manage options
  • Manage services
  • Manage {vendor_count} vendors
  • Read more about these purposes
View preferences
  • {title}
  • {title}
  • {title}